

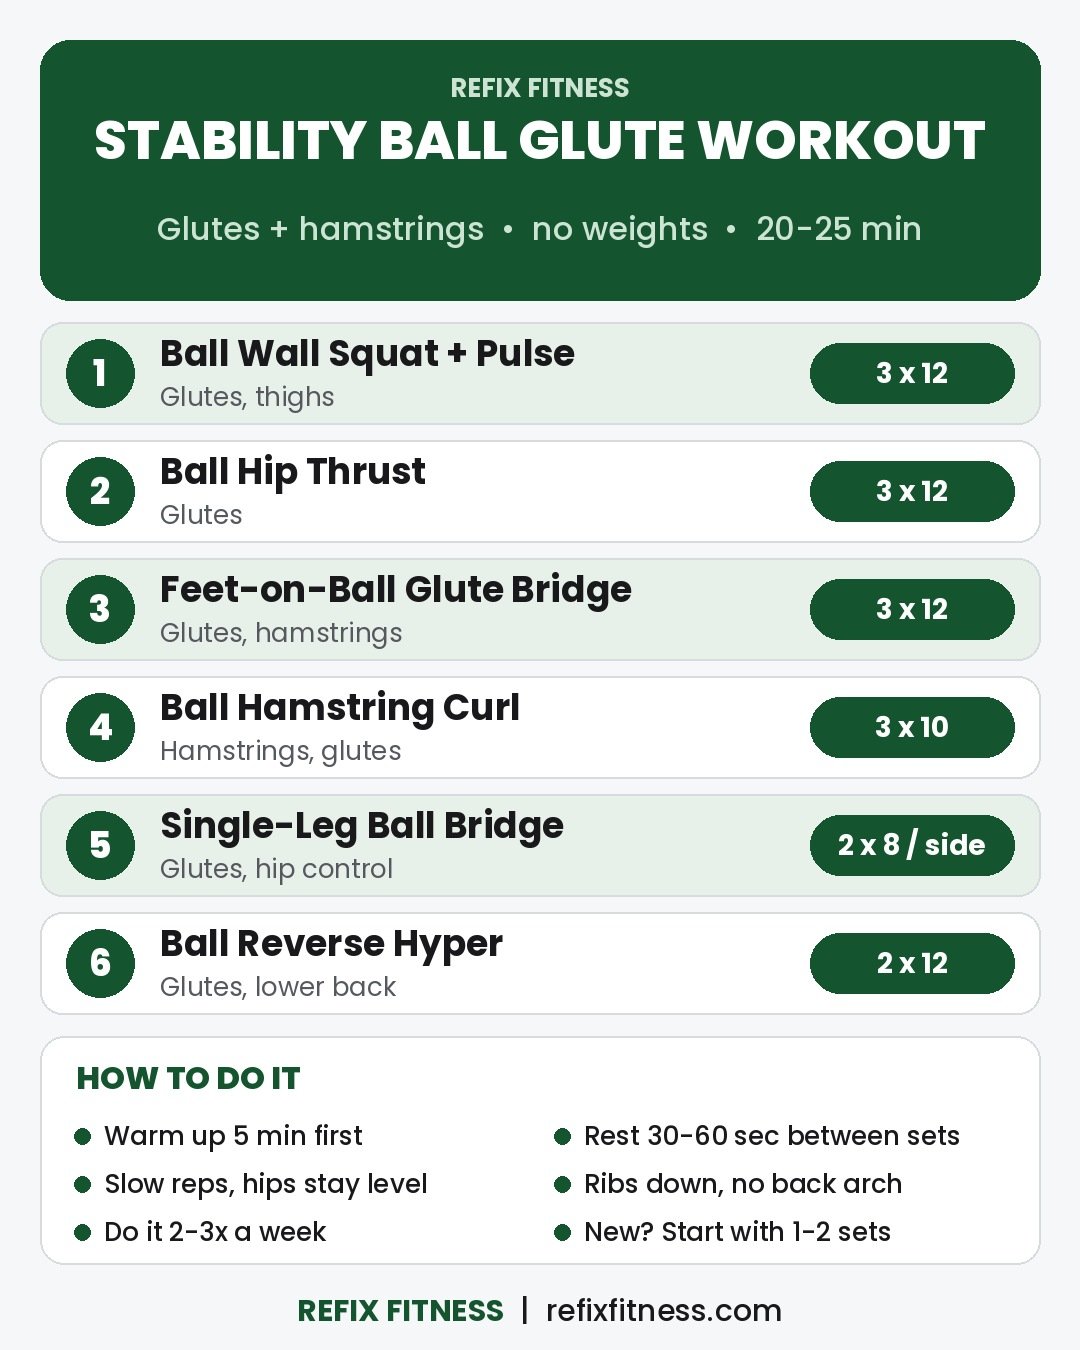
Quick answer: A stability ball glute workout can work your glutes and hamstrings at home with no weights, using just one exercise ball and a mat. This plan uses 6 moves: ball wall squat with pulse, ball hip thrust, feet-on-ball glute bridge, ball hamstring curl, single-leg ball bridge and ball reverse hyperextension. Do 2-3 sets of each with slow, controlled reps, rest 30-60 seconds between sets, and repeat the workout 2-3 times a week on non-consecutive days.
It’s for people who already know a basic glute bridge and want the next step without buying dumbbells. Below: the plan, form cues, easier and harder options, a sample week, common mistakes and FAQs.
Why Use a Stability Ball for Glutes and Hamstrings?
A stability ball (also called an exercise ball or Swiss ball) changes floor moves in two ways. It raises your feet or upper back off the floor, so your hips move through a bigger range than in a floor bridge. And because it rolls, your glutes, hamstrings and core must work together to keep it steady.
The rolling surface also allows the ball hamstring curl, which works the back of your thighs while your glutes hold your hips up. Most bodyweight glute routines barely touch the hamstrings, so this fills a real gap.
If you’re brand new to glute training, start with our bodyweight glute workout for beginners at home for 2-3 weeks, then come back here. If you’d like a gentler, full-body ball routine instead of a lower-body focus, try our stability ball workout for women over 50.
The CDC’s adult activity guidelines recommend muscle-strengthening activities on 2 or more days a week that work all major muscle groups, plus at least 150 minutes of moderate aerobic activity. This workout covers the legs and hips; pair it with upper body and core work on other days.
What You’ll Need
- A stability ball. A common rule of thumb is that when you sit on top of it with your feet flat, your hips and knees should be at roughly the same height. Your ball’s size chart is the best guide.
- Firm inflation. A softer ball is a little more stable while you learn.
- A mat on a non-slip floor, with clear space around it.
- A wall with nothing hanging on it, for the wall squat.
- About 20-25 minutes, including a 5-minute warm-up.
Stability Ball Glute Workout: The 6-Move Plan
Warm up for about 5 minutes first: march in place, then do 10 slow bodyweight squats and 10 floor glute bridges. Then do the moves in order, finishing all sets of one move before the next. Rest 30-60 seconds between sets. If you’re new to the ball, do 1-2 sets of each move for the first week or two.
| # | Exercise | Sets x Reps | Main Focus |
|---|---|---|---|
| 1 | Ball Wall Squat with Pulse | 3 x 12 | Glutes, thighs |
| 2 | Ball Hip Thrust | 3 x 12 | Glutes |
| 3 | Feet-on-Ball Glute Bridge | 3 x 12 | Glutes, hamstrings |
| 4 | Ball Hamstring Curl | 3 x 10 | Hamstrings, glutes |
| 5 | Single-Leg Ball Bridge | 2 x 8 per side | Glutes, hip control |
| 6 | Ball Reverse Hyperextension | 2 x 12 | Glutes, lower back |
1. Ball Wall Squat with Pulse
A supported squat that warms up your legs without worrying about balance.
- Place the ball between the wall and the small of your back. Walk your feet forward so they’re about hip-width apart and slightly in front of your body.
- Bend your knees and lower your hips, letting the ball roll up your back, until your thighs are close to parallel with the floor or as low as feels comfortable.
- Pulse up and down about 2 inches three times, then press through your whole foot to stand.
Form cues: keep your knees pointing the same way as your toes and your weight across your whole foot.
Easier: skip the pulses and squat only halfway down. Harder: hold the bottom for 3 seconds before the pulses.
2. Ball Hip Thrust
With your upper back on the ball, your hips travel further than in a floor bridge.
- Sit on the ball, then walk your feet forward and roll down until your head, neck and shoulder blades rest on the ball. Your feet should be flat and about hip-width apart.
- Let your hips drop toward the floor while keeping your upper back on the ball.
- Drive through your heels and squeeze your glutes to lift your hips until your body forms a straight line from shoulders to knees, with your knees bent at roughly 90 degrees.
- Hold for 1 second, then lower slowly.
Form cues: tuck your chin slightly and keep your ribs down, so the lift comes from your hips, not an arched lower back.
Easier: do a regular floor glute bridge instead. Harder: pause for 3 seconds at the top, or place a looped resistance band just above your knees.
3. Feet-on-Ball Glute Bridge
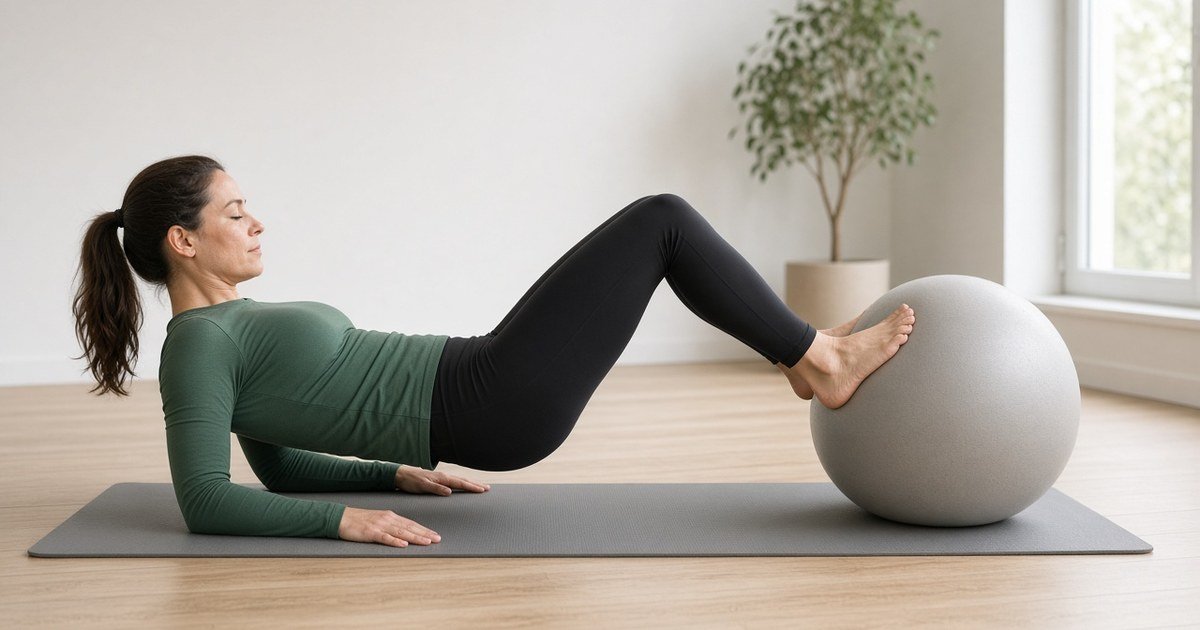
With the ball under your feet, your glutes and hamstrings must keep it from rolling away.
- Lie on your back on the mat with your arms by your sides, palms down. Rest your heels and lower calves on top of the ball, legs straight.
- Brace your stomach gently and press your heels down into the ball.
- Lift your hips until your body forms a straight line from shoulders to heels.
- Pause for 1 second, then lower with control.
Form cues: keep the ball still and centered, and stop lifting when your body is straight.
Easier: bend your knees and put the soles of your feet on top of the ball, which is more stable. Harder: cross your arms over your chest so you have less support from the floor.
4. Ball Hamstring Curl
The signature move of this workout, and harder than it looks.
- Start in the top position of move 3: heels on the ball, hips lifted, body in a straight line.
- Keeping your hips up, bend your knees and pull the ball in toward your bottom until the soles of your feet are on the ball.
- Pause briefly, then slowly straighten your legs to roll the ball back out, still keeping your hips lifted.
Form cues: your hips are the first thing to sag as you get tired. When they start to drop, finish the set. Roll the ball out slowly instead of letting it pull your legs straight.
Easier: lower your hips to the mat between reps, or do curls with your hips only slightly lifted. Harder: take 3-4 seconds to roll the ball out, or try it with one foot on the ball once two-leg curls feel solid.
5. Single-Leg Ball Bridge
Working one side at a time shows if one glute is doing more of the work.
- Lie on your back with both feet flat on top of the ball and your knees bent.
- Lift one foot and straighten that leg toward the ceiling, or hold the knee bent in the air.
- Press the other foot into the ball and lift your hips, keeping them level.
- Lower slowly. Finish all reps on one side, then switch.
Form cues: keep both hip bones level, and your arms wide on the floor for support.
Easier: keep both feet on the ball and shift most of your weight to one leg. Harder: add a 2-second hold at the top of each rep.
6. Ball Reverse Hyperextension
A face-down finisher that works your glutes from a different angle.
- Kneel behind the ball and roll forward until your hips and lower belly rest on top of it. Walk your hands forward until they’re flat on the floor under your shoulders, and let your feet rest lightly on the floor.
- Squeeze your glutes and lift both legs until they’re roughly in line with your body, keeping your legs fairly straight.
- Pause briefly, then lower slowly with control.
Form cues: lift only to about body height; swinging higher shifts the work into your lower back. Look at the floor.
Easier: lift one leg at a time, or bend your knees slightly. Harder: hold the top for 3 seconds on every rep.
Sample Weekly Plan
Here’s a simple week that leaves a rest day between glute sessions:
- Monday: stability ball glute workout
- Tuesday: brisk walk, 20-30 minutes
- Wednesday: upper body or core workout, such as our ab workout for women over 40 at home
- Thursday: stability ball glute workout
- Friday: brisk walk or easy bike ride
- Saturday: optional third glute session, or gentle stretching
- Sunday: rest
How to progress: once you can do every set with good form, add a third set to moves 5 and 6. After that, slow your lowering to 3 seconds, add a pause at the top, or try the harder options. The NHS physical activity guidelines give a useful effort target: do strength exercises to the point where you need a short rest before you could repeat them.
Common Mistakes to Avoid
- Using a ball that’s the wrong size or very soft. Both make the moves awkward and less effective.
- Arching your lower back at the top. If you feel bridges in your back more than your glutes, lift a little lower and keep your ribs down.
- Letting your hips sag during curls. Fewer reps with your hips up are better than more reps with them sinking.
- Rushing. Fast reps let momentum do the work. Go slow.
- Holding your breath. Breathe out as you lift and breathe in as you lower.
Safety Tips
- Check with your doctor first if you haven’t exercised in a while, are pregnant or recently gave birth, or have a heart condition, high blood pressure, or a back, hip, knee or hamstring injury.
- Clear the area. Make sure the ball can’t roll into furniture, pets or sharp corners, and avoid slippery floors.
- Inspect your ball. Don’t use one with cracks, punctures or a worn surface.
- Stop if something feels wrong. A sharp pull or cramp in the back of the thigh, pain in your lower back or knee, dizziness or chest discomfort are signs to stop, and get medical advice if they don’t settle.
FAQ
Can you build glutes with just a stability ball?
A ball makes glute and hamstring work harder than floor moves alone, especially hip thrusts and hamstring curls. To keep progressing over months, keep the moves challenging with slower reps, pauses, single-leg versions or, later, a resistance band or dumbbells.
What size stability ball should I use for glute exercises?
Check your ball’s size chart. As a quick test, when you sit on it with your feet flat, your hips and knees should be at about the same height. A ball that’s too big makes hip thrusts and bridges awkward.
Why do I feel the hamstring curl in my calves or lower back?
Calf cramps often happen when you push through your toes, so press your heels into the ball. Lower back strain usually means your hips are sagging or your back is arching. Lift only until your body is straight, brace your stomach, and use the easier version until it feels steady.
How often should I do a stability ball glute workout?
Two to three times a week on non-consecutive days is a good starting point. That fits the common guideline of muscle-strengthening activity on at least 2 days a week and gives your muscles time to recover.
Is this workout good for beginners?
It suits “advanced beginners” best: people who can already do 2-3 sets of floor glute bridges with good form. Complete beginners can start with the easier options and fewer sets, or build up with a floor-based routine first, such as our lower body workout for beginners over 50 at home.
Disclaimer: This article is for general information only and is not medical advice or a substitute for advice, diagnosis, or treatment from a qualified doctor. Please talk to a healthcare professional before starting a new exercise program, especially if you have a health condition, and read our full disclaimer.
Disclaimer: This article is for general information only and is not a substitute for advice, diagnosis or treatment from a qualified doctor. Please talk to a healthcare professional before changing your diet, exercise or medicines, especially if you are pregnant, breastfeeding or have a health condition, and read our full disclaimer.