
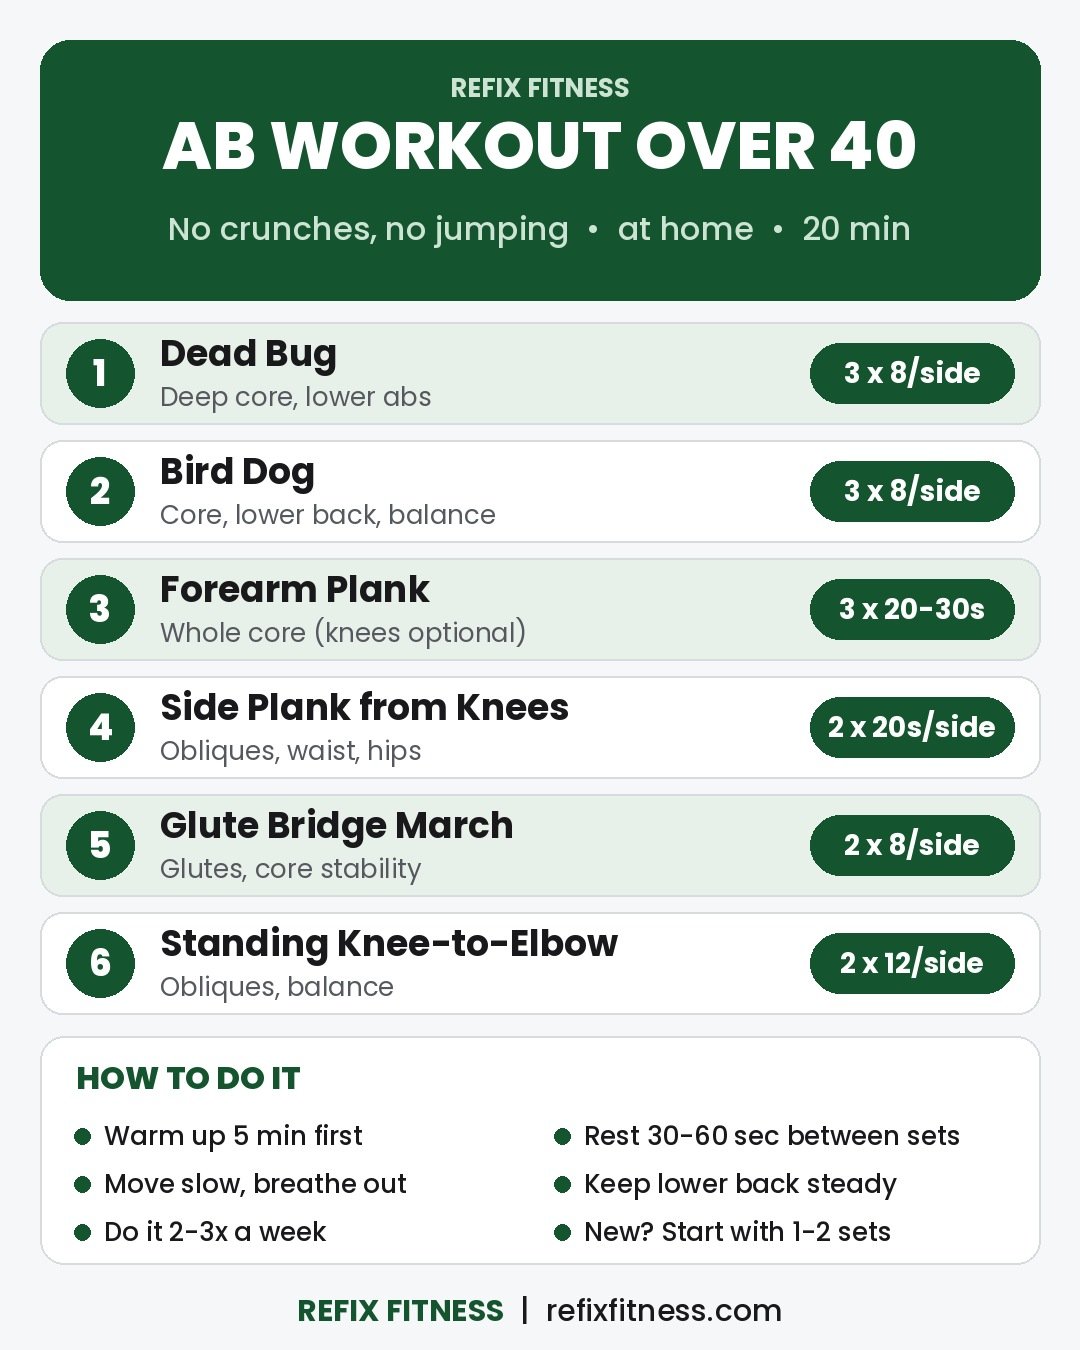
Quick answer: A simple ab workout for women over 40 at home doesn’t need crunches, sit-ups or jumping. This 20-minute plan uses 6 floor and standing moves that train your whole core: dead bug, bird dog, forearm plank, side plank from the knees, glute bridge march and standing knee-to-elbow. Do 2-3 sets of each move, rest 30-60 seconds between sets, and repeat the workout 2-3 times a week. All you need is a mat.
Below you’ll find the plan, form cues, easier and harder options, a sample week, common mistakes and FAQs.
Why Skip Crunches After 40?
Crunches aren’t “bad,” but they only train one job of your abs: curling your spine forward. Many women over 40 also find they strain the neck. Your core does much more: it holds your trunk steady while your arms and legs move, stops you twisting when you carry something on one side, and helps you catch your balance.
Mayo Clinic describes the core as the muscles around your trunk, including your pelvis, lower back, hips and stomach, and explains that core exercises train these muscles to work together for better balance and stability. It also notes that strengthening your core may help back pain get better and lower the risk of falls.
The CDC recommends muscle-strengthening activities on at least 2 days a week that work all major muscle groups, and the abdomen is on that list. This core routine is an easy way to cover it, either on its own or after a full-body session like our dumbbell workout for women over 40 at home.
What You’ll Need
- A mat or carpet for the floor moves.
- A wall, counter or sturdy chair nearby for balance during the standing move.
- About 20 minutes, or about 10 for one round on busy days.
Ab Workout for Women Over 40 at Home: The 6-Move Plan
Warm up for about 5 minutes first: march in place, roll your shoulders and do a few cat-cow stretches on your hands and knees. Then do the moves in order, finishing all sets of one move (resting 30-60 seconds between sets) before the next. If you’re new to core training, start with 1-2 sets of each move for the first couple of weeks.
| # | Exercise | Sets x Reps | Main Focus |
|---|---|---|---|
| 1 | Dead Bug | 3 x 8 per side | Deep core, lower abs |
| 2 | Bird Dog | 3 x 8 per side | Core, lower back, balance |
| 3 | Forearm Plank (knees optional) | 3 x 20-30 sec | Whole core, shoulders |
| 4 | Side Plank from Knees | 2 x 20 sec per side | Obliques, waist, hips |
| 5 | Glute Bridge March | 2 x 8 per side | Glutes, core stability |
| 6 | Standing Knee-to-Elbow | 2 x 12 per side | Obliques, balance |
How to Do Each Move
1. Dead Bug
Teaches your abs to keep your trunk still while your arms and legs move, with no strain on your neck.
- Lie on your back with your arms reaching straight up toward the ceiling.
- Lift your legs so your knees are bent at about 90 degrees, stacked over your hips (the “tabletop” position).
- Gently brace your stomach, as if you’re about to cough, so your ribs stay down and your lower back stays close to the mat.
- Slowly reach your right arm back overhead and lower your left leg toward the floor. Go only as far as you can without your lower back arching.
- Return to the start and switch sides. That’s 1 rep per side.
Form cues: breathe out as you reach, move slowly (about 2-3 seconds out), and keep your head resting on the mat.
Easier: keep your arms still and only tap one heel to the floor at a time, knees bent. Harder: straighten the leg further as it lowers, or pause for 2 seconds at the bottom of each rep.
2. Bird Dog
Works your core and back muscles while training balance.
- Start on your hands and knees, hands under your shoulders and knees under your hips.
- Brace your stomach so your back stays flat, like a tabletop.
- Reach your right arm forward and your left leg back until both are roughly in line with your body.
- Hold for 2 seconds, keeping your hips level, then return with control and switch sides.
Form cues: imagine a cup of tea on your lower back and don’t spill it by twisting or arching. Look at the floor just ahead of your hands.
Easier: move only the leg, or only the arm, keeping both hands or both knees down. Harder: hold each rep for 5 seconds, or bring your elbow and knee together under your body before reaching out again.
3. Forearm Plank (Knees Optional)
A classic hold that works the front, sides and back of your core at the same time.
- Rest on your forearms with your elbows under your shoulders.
- Step your feet back so your body forms a straight line from head to heels, or keep your knees down for a shorter lever.
- Squeeze your glutes and gently pull your belly button in. Keep breathing.
- Hold for 20-30 seconds, then lower your knees and rest.
Form cues: don’t let your hips sag toward the floor or pike up toward the ceiling. Press the floor away so your shoulders don’t sink.
Easier: do an incline plank with your forearms on a sturdy table or kitchen counter, or hold on your knees. Harder: hold longer (up to 45 seconds), or slowly lift one foot an inch off the floor for a few seconds at a time.
4. Side Plank from Knees
Targets the obliques along your waist and the muscles that keep your hips level when you walk.
- Lie on your right side, propped up on your right forearm with your elbow under your shoulder.
- Bend your knees so your feet are behind you, and stack your hips.
- Press into your forearm and knee to lift your hips until your body is in a straight line from head to knees.
- Hold for 20 seconds, lower with control and switch sides.
Form cues: keep your hips pushed slightly forward rather than letting them drift back, and keep your top shoulder stacked over the bottom one.
Easier: do a standing side lean with your forearm on a wall. Harder: straighten your legs into a full side plank with your feet stacked or staggered.
5. Glute Bridge March
Your glutes and core work as a team to steady your pelvis. This move trains both at once.
- Lie on your back with your knees bent, feet flat and hip-width apart, arms by your sides.
- Press through your heels and squeeze your glutes to lift your hips until your shoulders, hips and knees line up.
- Keeping your hips level, slowly lift your right foot a few inches off the floor, then put it back down.
- Repeat with your left foot. Continue alternating, then lower your hips after the last rep.
Form cues: keep your hips from dipping or rotating when one foot lifts. Think “ribs down, glutes tight.”
Easier: do a regular glute bridge with both feet down, holding for 2 seconds at the top. Harder: hold each foot up for 3 seconds, or straighten the lifted leg.
6. Standing Knee-to-Elbow
An upright oblique move that also challenges balance, finishing the workout on your feet.
- Stand tall with your feet hip-width apart and your fingertips lightly behind your head, elbows wide.
- Shift your weight onto your left foot and lift your right knee up and slightly out to the side.
- At the same time, bring your right elbow down toward your right knee, squeezing the side of your waist. They don’t need to touch.
- Return to standing tall. Do 12 reps on one side, then switch.
Form cues: move at a steady pace rather than swinging, don’t pull on your head, and keep your standing knee softly bent.
Easier: hold a wall or chair with one hand and use a smaller knee lift. Harder: bring the opposite elbow across your body to the knee, or hold a light dumbbell overhead in the opposite hand.
Sample Weekly Plan
Aim for 2-3 core sessions a week, with at least one rest day or easy day between them. Pair them with walking and other strength work for a well-rounded week:
- Monday: Ab workout, 2 sets of each move
- Tuesday: Brisk walk, 20-30 minutes
- Wednesday: Full-body strength, such as our resistance band workout or dumbbell routine
- Thursday: Ab workout, full sets
- Friday: Walk, plus 10 minutes of gentle stretching
- Saturday: Ab workout, full sets, or our low-impact workout at home with no jumping
- Sunday: Rest
How to progress: when every set feels controlled and the last reps no longer feel challenging, change one thing at a time. Add 1-2 reps per side, add 5-10 seconds to the planks, add a set, or try the harder option for one move.
Common Mistakes to Avoid
- Holding your breath. Breathe out during the hardest part of each move, such as reaching in the dead bug or lifting your hips in the bridge. On planks, keep slow, steady breaths.
- Arching your lower back. If your back lifts off the mat in the dead bug or sags in the plank, shorten the move. A smaller range with good control works your core better.
- Rushing. Core moves work best slow. Speed lets momentum do the job instead of your muscles.
- Expecting spot reduction. Mayo Clinic notes that it takes aerobic activity to burn fat in your stomach, while core exercises strengthen and tone the muscles underneath.
- Bearing down or bulging. If you see your stomach dome or bulge along the middle during a move, or feel pressure downward, ease off and choose the easier option.
Safety Tips
- Check with your doctor first if you haven’t exercised for a while, or if you have a heart condition, high blood pressure, osteoporosis, back or joint problems, or recent surgery, injury or pregnancy.
- Get specialist help for pelvic or tummy concerns. If you have known abdominal separation after pregnancy, a hernia, leaking when you cough or exercise, or a feeling of heaviness in your pelvis, a pelvic health physical therapist can adapt the moves for you. Our guide to stability ball exercises for women over 50 includes more supported options.
- Stop if something hurts. Muscle effort and mild soreness are normal. Sharp pain, back pain that travels down your leg, dizziness or chest discomfort are signs to stop and get medical advice.
FAQ
What is the best ab exercise for women over 40?
There isn’t one single best move. Your core has several jobs, so a mix works best: a move that resists arching (dead bug, plank), one that resists twisting and builds balance (bird dog), one for the sides of your waist (side plank) and one that links your core and glutes (bridge march). This plan covers all of these.
How often should I do this ab workout?
Two to three times a week on non-consecutive days is a good start for most people. You can do it as a short session on its own, or after your strength workout.
Will this workout get rid of belly fat?
No workout can target fat in one spot. These moves strengthen the muscles under your stomach, but reducing body fat depends on overall activity, eating habits, sleep and stress. Regular walking or other cardio plus strength training helps most.
Can I do this ab workout if I have lower back pain?
Back pain has many causes, so check with your doctor or a physical therapist first. If you get the go-ahead, start with the easier options and stop any move that makes your pain worse.
Disclaimer: This article is for general information only and is not medical advice or a substitute for advice, diagnosis, or treatment from a qualified doctor. Please talk to a healthcare professional before starting a new exercise program, especially if you have a health condition, and read our full disclaimer.
Disclaimer: This article is for general information only and is not a substitute for advice, diagnosis or treatment from a qualified doctor. Please talk to a healthcare professional before changing your diet, exercise or medicines, especially if you are pregnant, breastfeeding or have a health condition, and read our full disclaimer.