
Stability Ball Workout for Women Over 50: 9 Beginner Moves
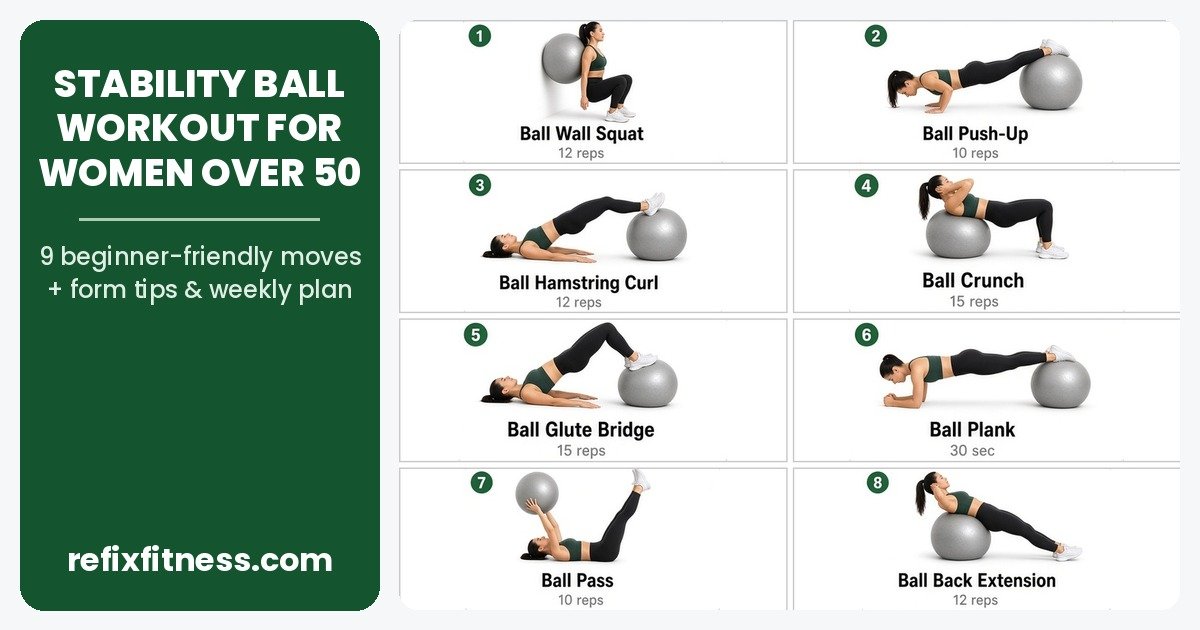
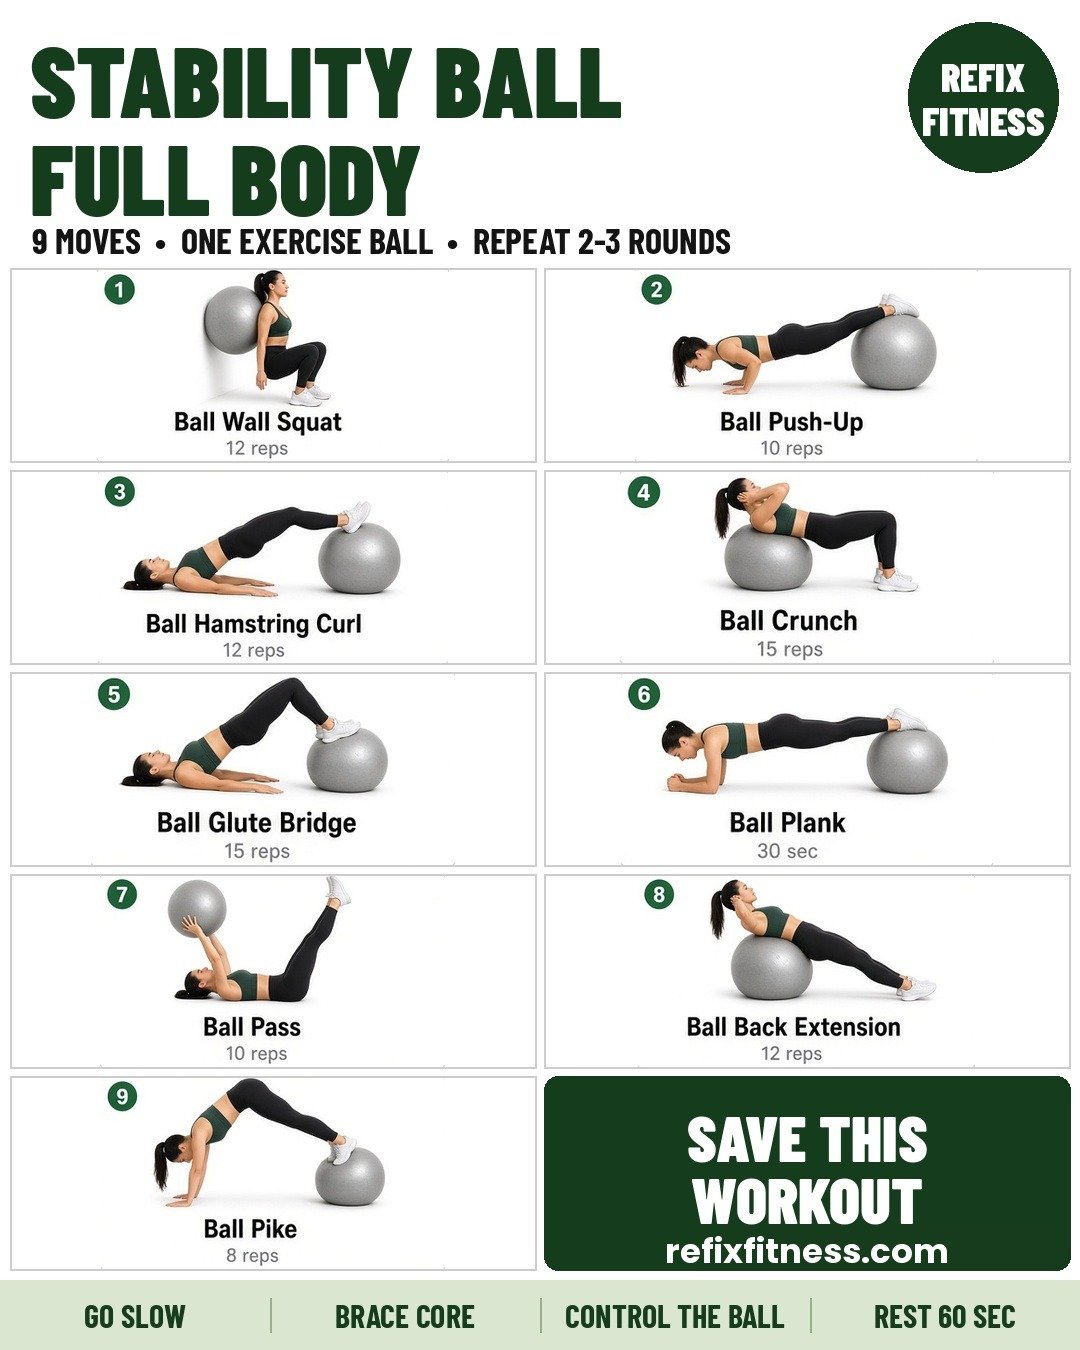
Quick answer: A good stability ball workout for women over 50 uses slow, controlled moves that work your whole body with just one exercise ball. This 9-move routine includes a ball wall squat, ball push-up, hamstring curl, crunch, glute bridge, plank, ball pass, back extension and pike. Do the moves as a circuit, repeat 2-3 rounds with about 60 seconds of rest between rounds, and train two or three days a week. Start with the easier version of each move and keep a wall or sturdy chair nearby for support. The whole session takes about 20-25 minutes.
A stability ball (also called an exercise ball or Swiss ball) makes your core work a little harder with every move, without heavy weights. Below you’ll find the full routine, form cues, common mistakes, and an easier or harder version of every exercise.
Before You Start: Pick the Right Ball and Set Up Safely
The right ball size matters more than most people think. When you sit on the ball with your feet flat, your hips and knees should be bent to about 90 degrees, with your hips level with or just above your knees. Use this as a rough guide:
- Under 5’0″: 45 cm ball (about 18 inches)
- 5’0″ to 5’5″: 55 cm ball (about 22 inches)
- 5’6″ to 6’0″: 65 cm ball (about 26 inches)
A slightly softer ball is more stable for beginners. Choose an “anti-burst” ball and check it for scuffs or soft spots before each session.
Set up on a non-slip surface such as an exercise mat or carpet, not polished wood or tile. Clear the space around you, wear shoes with grip or go barefoot (not socks), and keep a wall or a sturdy chair within reach for the first few weeks.
The 9-Move Stability Ball Workout at a Glance
Warm up for 5 minutes first: march in place, roll your shoulders, and do a few gentle hip circles while seated on the ball. Then do the moves below as a circuit: one set of each move in order, rest about 60 seconds, and repeat for 2-3 rounds in total. Beginners can start with 1-2 rounds and fewer reps.
| # | Exercise | Reps per Round | Main Focus |
|---|---|---|---|
| 1 | Ball Wall Squat | 12 reps | Thighs, glutes |
| 2 | Ball Push-Up | 10 reps | Chest, shoulders, arms, core |
| 3 | Ball Hamstring Curl | 12 reps | Hamstrings, glutes, core |
| 4 | Ball Crunch | 15 reps | Abs |
| 5 | Ball Glute Bridge | 15 reps | Glutes, hamstrings, lower back |
| 6 | Ball Plank | 30 seconds | Deep core, shoulders |
| 7 | Ball Pass | 10 reps | Abs, hip flexors, coordination |
| 8 | Ball Back Extension | 12 reps | Upper back, posture, chest opening |
| 9 | Ball Pike | 8 reps | Core, shoulders (most advanced move) |
Four rules apply to every move: go slow, brace your core, control the ball, and rest about 60 seconds between rounds. Moves 1, 3, 4, 5 and 7 are the most beginner-friendly. Moves 2, 6 and 9 put your feet on the ball, which takes more balance and strength, so use the easier versions below until you feel steady.
How to Do Each Exercise
1. Ball Wall Squat
The ball guides your back up and down the wall, so this is one of the most comfortable ways to practice a squat and build leg strength.
- Place the ball between your back and a wall, and lean gently into it.
- Walk your feet about 12-18 inches forward, hip-width apart, toes pointing forward or slightly out.
- Bend your knees and sit back, letting the ball roll up your back as you lower.
- Go as low as feels comfortable, up to thighs parallel with the floor, keeping your knees over your ankles.
- Press through your whole foot to stand back up, squeezing your glutes at the top.
Muscles worked: quadriceps (front of thighs), glutes, hamstrings, and core.
Common mistakes: feet too close to the wall (your knees drift far past your toes), knees caving inward, and dropping down too fast. Lower for a slow count of three.
Easier: only bend halfway down, or hold onto a chair beside you. Harder: pause for 3 seconds at the bottom of each rep.
2. Ball Push-Up
With your shins or feet on the ball and your hands on the floor, your core has to work hard to keep the ball still while your chest and arms do the pushing. This is one of the harder moves in the routine, so start with the easier version if push-ups are new to you.
- Kneel in front of the ball and lie your stomach over it, hands on the floor.
- Walk your hands forward until the ball sits under your shins or the tops of your feet and your hands are under your shoulders.
- Brace your stomach so your body forms a straight line from head to heels. Keep your neck long and look at the floor.
- Bend your elbows, angled about 45 degrees from your body, and lower your chest toward the floor.
- Push back up without letting your hips sag or the ball roll sideways.
Muscles worked: chest, front of the shoulders, triceps, and the whole core.
Common mistakes: hips sagging toward the floor, elbows flaring straight out to the sides, and going too low too soon.
Easier: keep the ball under your thighs (closer to your hips), or do a wall push-up with your hands on the ball pressed against a wall. Harder: roll out until only your toes are on the ball.
3. Ball Hamstring Curl
This move works the back of your legs, which many workouts miss, and it is gentle on the knees.
- Lie on your back on a mat with your arms by your sides, palms down.
- Rest your heels on top of the ball with your legs straight.
- Press your heels into the ball and lift your hips until your body forms a straight line from shoulders to heels.
- Keeping your hips up, bend your knees and roll the ball in toward your bottom.
- Slowly straighten your legs to roll the ball back out. Keep your hips lifted for the whole set.
Muscles worked: hamstrings, glutes, calves, and core.
Common mistakes: letting your hips drop as you roll the ball out, arching your lower back, and rushing.
Easier: just hold the lifted position for 10-15 seconds, or lower your hips between each curl. Harder: cross your arms over your chest so your arms give less support.
4. Ball Crunch
The ball supports the curve of your back, so many people find this more comfortable than a crunch on the floor.
- Sit on the ball, then walk your feet forward until the ball sits under your mid and lower back. Feet flat, hip-width apart, knees at 90 degrees.
- Place your fingertips lightly behind your head, elbows wide.
- Breathe out and curl your ribs toward your hips, lifting your shoulders a few inches.
- Pause, then lower slowly back over the ball.
Muscles worked: rectus abdominis (the “six-pack” muscle) and obliques.
Common mistakes: pulling on your neck, sitting all the way up, and letting the ball roll as you move. Keep your elbows wide and your gaze up and slightly forward.
Easier: cross your arms over your chest and make the movement smaller. Harder: walk your feet closer together.
5. Ball Glute Bridge
Placing your feet on the ball makes a regular bridge harder, because your hips and core have to keep the ball steady.
- Lie on your back on a mat with your arms by your sides, palms down.
- Place your heels and the soles of your feet on top of the ball, knees bent.
- Tighten your stomach, then press into the ball and lift your hips until your body forms a straight line from shoulders to knees.
- Squeeze your glutes for 2 seconds at the top.
- Lower slowly, one vertebra at a time.
Muscles worked: glutes, hamstrings, and lower back.
Common mistakes: pushing your hips too high and arching your back, and letting your knees fall in or out.
Easier: do the bridge with your feet flat on the floor. Harder: hold the top for 5 seconds, or lift one foot slightly.
6. Ball Plank
A plank with your feet on the ball is a strong test of your deep core and shoulders.
- Start on your forearms on the mat, elbows under your shoulders.
- Place your shins or feet on the ball behind you.
- Lift your hips until your body is in a straight line from head to heels.
- Brace your stomach, breathe steadily, and hold for up to 30 seconds.
Muscles worked: transverse abdominis (deep core), obliques, shoulders, and glutes.
Common mistakes: hips sagging or piking up, holding your breath, and dropping your head.
Easier: do a forearm plank on the floor on your knees, or place your forearms on the ball and your knees on the mat. Harder: hold for 45 seconds.
7. Ball Pass
This core move trains your abs and coordination while your lower back stays supported on the floor.
- Lie on your back and hold the ball above your chest with straight arms. Lift your legs straight toward the ceiling (or keep your knees bent).
- Press your lower back gently toward the floor.
- Reach up and place the ball between your ankles or feet, gripping it with your legs.
- Lower your arms overhead and your legs toward the floor only as far as you can keep your back flat, then bring them back up and pass the ball back to your hands. Each pass is one rep.
Muscles worked: rectus abdominis, lower abs, hip flexors, and inner thighs.
Common mistakes: letting your lower back arch off the mat, swinging the legs, and holding your breath. Breathe out as you pass.
Easier: keep your knees bent at 90 degrees and do not lower your legs between passes. Harder: lower your arms and legs closer to the floor before each pass.
8. Ball Back Extension
This version is done face up: you lie back over the ball and gently extend (arch) your upper back. It opens the chest and counters the rounded “desk posture” many of us slip into.
- Sit on the ball and walk your feet forward until your upper and mid back rest on the ball. Feet flat, hip-width apart; beginners keep knees bent.
- Place your fingertips lightly behind your head to support your neck.
- Breathe in and slowly let your upper back extend over the curve of the ball, opening your chest toward the ceiling.
- Breathe out and gently curl back to the start. Keep the movement small and smooth.
Muscles worked: upper back extensors, chest and shoulder openers, and the core muscles that keep you steady.
Common mistakes: dropping your head back without support, rolling too far, and walking your feet too close together so the ball wobbles.
Easier: keep your knees bent, feet wide, and make the arch very small. Harder: walk your feet farther out so your legs are almost straight, as in the photo. Skip this move if you have osteoporosis in the spine or feel dizzy lying back; ask your doctor or physical therapist first.
9. Ball Pike
The pike is the most advanced move in this routine. Treat it as optional and only add it once the ball plank feels easy.
- Start in a high plank with your hands under your shoulders and your shins or the tops of your feet on the ball.
- Brace your stomach, then lift your hips toward the ceiling, rolling the ball in toward your hands with your legs straight.
- Stop when your hips are over your shoulders, then slowly lower back to a straight plank.
Muscles worked: deep abs, hip flexors, shoulders, and arms.
Common mistakes: moving too fast, letting the hips sag on the way back, and putting too much weight forward in the wrists.
Easier: do a ball knee tuck instead (bend your knees and roll the ball toward your chest), or replace it with an extra plank hold. Harder: pause for 2 seconds at the top.
Sample Weekly Schedule
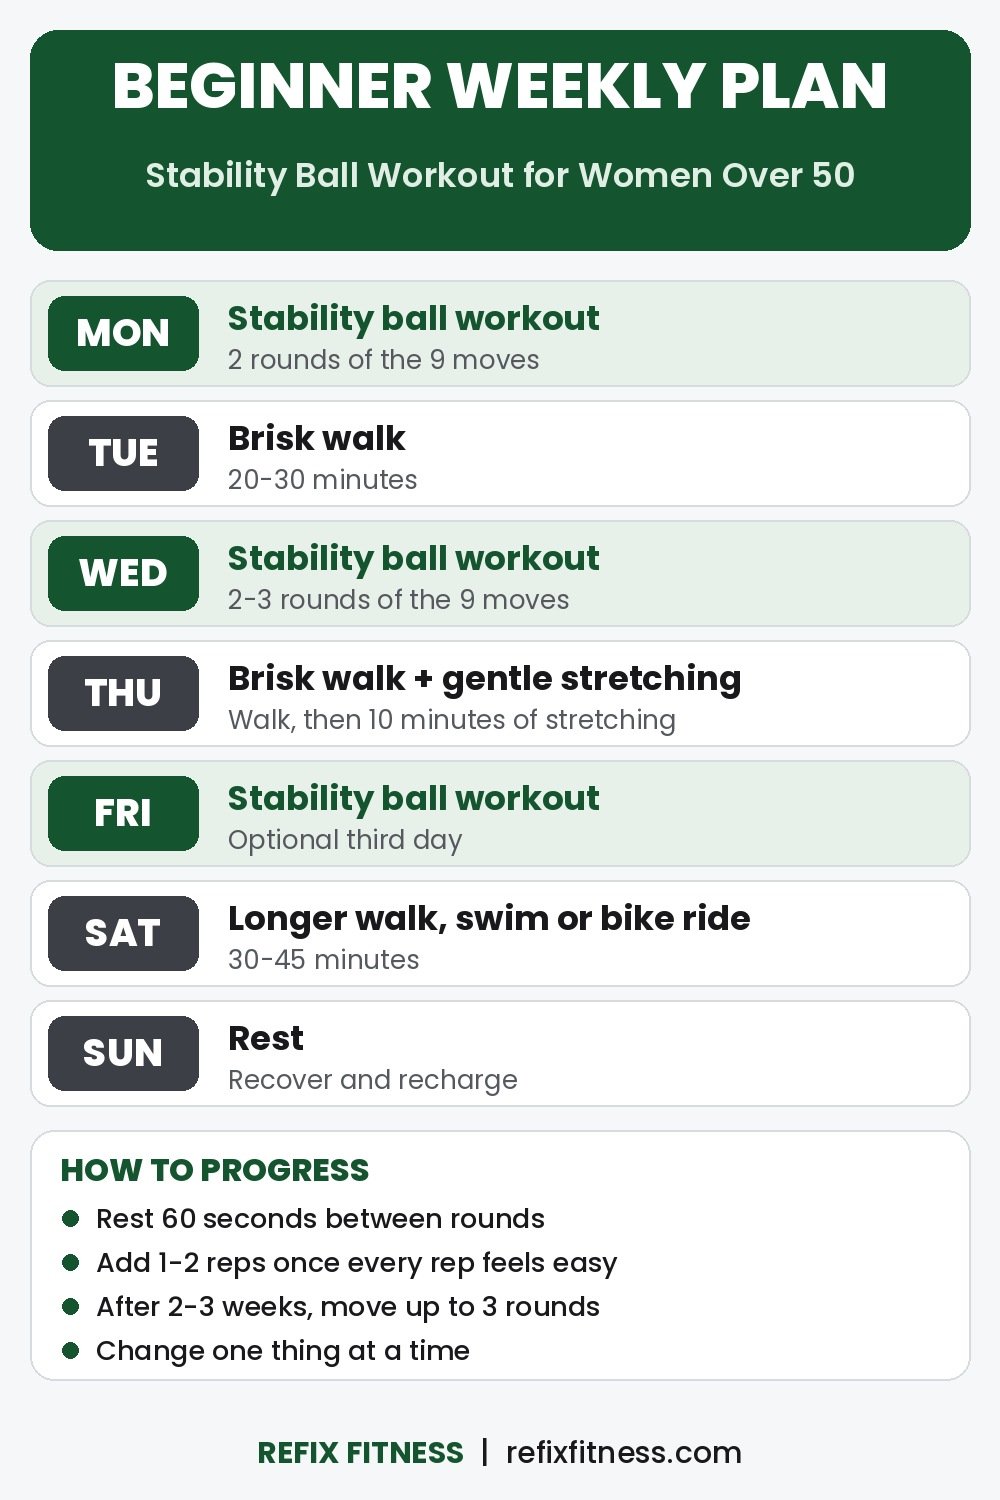
The CDC recommends that adults get at least 150 minutes of moderate activity a week plus muscle-strengthening activity on 2 or more days. This ball routine covers the strength part, and walking fills in the rest. Here is a simple beginner week:
| Day | What to Do |
|---|---|
| Monday | Stability ball workout (2 rounds of the 9 moves) |
| Tuesday | Brisk walk, 20-30 minutes |
| Wednesday | Stability ball workout |
| Thursday | Brisk walk + 10 minutes of gentle stretching |
| Friday | Stability ball workout (optional third day) |
| Saturday | Longer walk, swim, or bike ride, 30-45 minutes |
| Sunday | Rest |
How to progress: once you can finish every set with good form and feel you could do 2-3 more reps, add a rep or two to each move. After two or three weeks at that level, move up to 3 rounds, then try the harder versions. Change one thing at a time.
Stretching on your off days helps you move better during your workouts. Our guide to natural ways to improve flexibility has simple ideas you can add to your walking days.
Why a Stability Ball Works Well After 50
Muscle strength naturally declines with age, and regular strength training helps you hold on to it. A ball is a beginner-friendly way to start:
- It trains balance with every rep. The ball moves slightly under you, so the small stabilizing muscles in your hips, ankles, and trunk have to work.
- It’s low impact. No jumping and no heavy loads, which is easier on your joints.
- It’s adjustable. Small changes in where the ball sits or where your feet go make each move easier or harder.
Pair your workouts with good nutrition. Protein, calcium, and vitamin D all matter for muscles and bones; see our list of the best foods for strong bones.
Safety Notes
- Talk to your doctor first if you have osteoporosis, a balance or inner-ear condition, high blood pressure, a recent injury or surgery, or a joint replacement, or if you haven’t exercised in a long time. A physical therapist can adjust these moves for you.
- Stay near support. Use a wall or a sturdy chair for every seated and standing move until you feel steady.
- Move slowly. Control matters more than speed or the number of reps. Never bounce hard on the ball.
- Don’t hold your breath. Breathe out during the effort and in as you return.
- Stop if something hurts. Mild muscle tiredness is normal. Sharp pain, joint pain, dizziness, chest discomfort, or unusual shortness of breath are signs to stop and get medical advice.
- Look after your knees. If squats bother your knees, use the easier versions and a smaller range. Our post on home remedies for knee pain has more everyday tips, but persistent knee pain should be checked by a professional.
This workout is designed to build general strength and balance. It is not a treatment for any medical condition.
Frequently Asked Questions
What size stability ball should a woman over 50 use?
Most women between 5’0″ and 5’5″ do best with a 55 cm ball, and women 5’6″ to 6’0″ usually need a 65 cm ball. The real test is sitting on it: your hips and knees should be bent to about 90 degrees with your feet flat on the floor.
How often should I do this stability ball workout?
Two or three non-consecutive days a week is a good target for beginners. Leave at least one rest day between sessions so your muscles can recover, and add walking or other light cardio on the days in between.
Can stability ball exercises help with balance?
Yes. Because the ball moves under you, many ball exercises make you engage the muscles that keep you steady. Moves like the ball plank, ball push-up and hamstring curl are especially useful, because you have to keep the ball steady. Start with support nearby and progress slowly.
Is a stability ball safe if I have back problems?
Gentle ball moves like the glute bridge and ball pass are often well tolerated, but back problems vary a lot. Check with your doctor or a physical therapist before starting, and stop any move that causes pain.
How long until I see results?
Many people notice that moves feel easier and steadier within 3-4 weeks of consistent practice. Visible changes in muscle tone take longer and depend on your diet, sleep, and overall activity.
Disclaimer: This article is for general information only and is not a substitute for advice, diagnosis, or treatment from a qualified doctor. Please talk to a healthcare professional before starting a new exercise program, especially if you have a health condition, and read our full disclaimer.
Disclaimer: This article is for general information only and is not a substitute for advice, diagnosis or treatment from a qualified doctor. Please talk to a healthcare professional before changing your diet, exercise or medicines, especially if you are pregnant, breastfeeding or have a health condition, and read our full disclaimer.
