

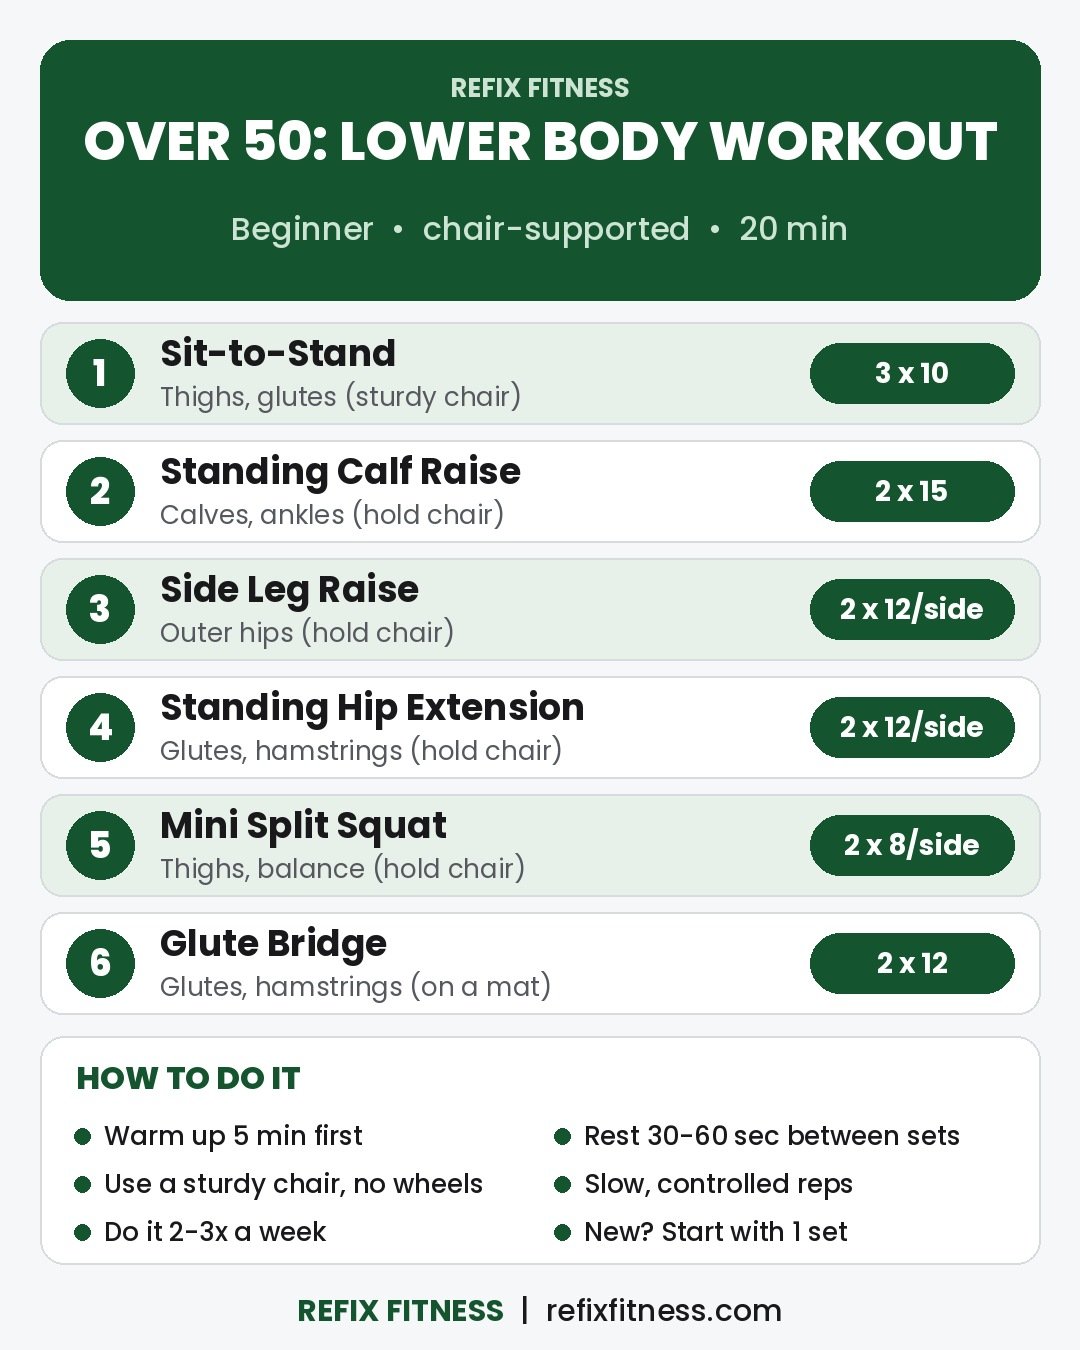
Quick answer: A simple lower body workout for beginners over 50 at home needs only a sturdy chair, a mat and about 20 minutes. This plan uses 6 chair-supported moves: sit-to-stand, standing calf raise, side leg raise, standing hip extension, mini split squat and glute bridge. Do 2-3 sets of each, rest 30-60 seconds between sets, and repeat the workout 2-3 times a week on non-consecutive days.
It’s written for people in their 50s who are new to strength training or coming back after a long break, and who want something steadier than a gym leg day. Below you’ll find the plan, form cues, easier and harder options, a sample week, common mistakes and FAQs.
Why Train Your Lower Body After 50?
Your legs and hips do the work every time you get out of a chair, climb stairs or carry groceries. Training them on purpose is a practical way to keep those everyday movements feeling easier.
Health guidelines include the legs and hips in their basic strength advice. The CDC’s adult activity guidelines recommend muscle-strengthening activities on 2 or more days a week that work all the major muscle groups, including the legs and hips, along with at least 150 minutes of moderate aerobic activity such as brisk walking. This routine covers the lower body part of that.
Using a chair for support is not “cheating.” It lets you focus on the muscles instead of wobbling, and you can rely on it less over time. The NHS strength exercises guide uses the same approach, with the back of a chair for stability during calf raises, sideways leg lifts and leg extensions.
What You’ll Need
- A sturdy chair without wheels or arms that won’t slip. Push it against a wall if your floor is smooth. A kitchen counter also works for the standing moves.
- A mat, rug or carpet for the glute bridge.
- About 20 minutes, including a 5-minute warm-up.
Lower Body Workout for Beginners Over 50 at Home: The 6-Move Plan
Warm up for about 5 minutes first: march in place while holding the chair, do gentle side steps, circle your ankles, and swing each leg forward and back a few times. Then do the moves in order, finishing all sets of one move before moving on. Rest 30-60 seconds between sets. If you’re brand new to exercise, start with 1 set of each move for the first week or two.
| # | Exercise | Sets x Reps | Main Focus |
|---|---|---|---|
| 1 | Sit-to-Stand | 3 x 10 | Thighs, glutes |
| 2 | Standing Calf Raise (hold chair) | 2 x 15 | Calves, ankles |
| 3 | Side Leg Raise (hold chair) | 2 x 12 per side | Outer hips |
| 4 | Standing Hip Extension (hold chair) | 2 x 12 per side | Glutes, hamstrings |
| 5 | Mini Split Squat (hold chair) | 2 x 8 per side | Thighs, glutes, balance |
| 6 | Glute Bridge | 2 x 12 | Glutes, hamstrings |
1. Sit-to-Stand
Trains exactly what you do every time you stand up from a chair, sofa or car seat.
- Sit near the front edge of the chair with your feet flat on the floor, about hip-width apart, and slightly behind your knees.
- Cross your arms over your chest or reach them forward.
- Lean your chest forward a little, then press through your whole foot to stand up tall.
- Push your hips back and lower yourself slowly to the chair, taking about 3 seconds to sit down.
Form cues: keep your knees in line with your toes, not caving in toward each other. Sit down softly rather than dropping into the seat.
Easier: use your hands on your thighs or the chair seat to help push up, or add a firm cushion to raise the seat. Harder: pause for 2 seconds just above the seat before sitting, or use a lower chair.
2. Standing Calf Raise (Hold Chair)
Works the calves and ankles, which help with walking and stairs.
- Stand behind the chair with both hands resting lightly on the backrest, feet hip-width apart.
- Slowly rise up onto the balls of your feet, lifting your heels as high as is comfortable.
- Pause for 1 second at the top.
- Lower your heels slowly back to the floor.
Form cues: stay tall and keep your weight over your big toe and second toe, not rolling to the outside of your feet. Move slowly in both directions.
Easier: do a smaller lift, or do it seated with your feet flat on the floor. Harder: hold the chair with only your fingertips, or take 3 seconds to lower.
3. Side Leg Raise (Hold Chair)
Strengthens the muscles on the outside of your hips, which help keep your pelvis level when you walk and stand on one leg.
- Stand behind the chair holding the backrest, feet together and toes pointing forward.
- Shift your weight onto your left leg.
- Lift your right leg out to the side, keeping it straight and your toes pointing forward, as far as is comfortable.
- Lower slowly. Do all reps on one side, then switch.
Form cues: keep your upper body upright and don’t lean toward the standing leg. The lift is usually small. If you have to tilt your body to get the leg higher, it’s too high.
Easier: lift only a few inches and do fewer reps. Harder: hold the top for 2-3 seconds, or add a light resistance band above your knees once you’re comfortable. See our resistance band workout for women over 50 for more band moves.
4. Standing Hip Extension (Hold Chair)
Trains the glutes and hamstrings from a standing position, so there’s no need to get down on the floor.
- Stand behind the chair holding the backrest, feet hip-width apart. Lean forward very slightly from the hips.
- Shift your weight onto your left leg and keep a soft bend in that knee.
- Squeeze your right glute and move your straight right leg backward a few inches.
- Pause for 1-2 seconds, then return slowly. Do all reps on one side, then switch.
Form cues: the movement comes from your hip, not your lower back. Stop before your back starts to arch. Keep your hips facing the chair, not twisting open.
Easier: do a shorter range or bend the moving knee slightly. Harder: hold the back position for up to 5 seconds on each rep.
5. Mini Split Squat (Hold Chair)
A shortened lunge where your feet stay in place, training one leg at a time.
- Stand beside the chair and hold the backrest with one hand.
- Step your right foot back about 2 feet and rise onto the ball of that foot. Keep your left foot flat.
- Bend both knees to lower your body a few inches, keeping most of your weight on the front leg.
- Press through your front heel to rise back up. Do all reps on one side, then turn around and switch.
Form cues: keep your front knee pointing the same way as your toes and your front heel down.
Easier: take a shorter stance and lower only an inch or two, or hold the chair with both hands. Harder: lower a little deeper, or pause for 2 seconds at the bottom of each rep.
6. Glute Bridge
The only floor move in the plan. It works the glutes and hamstrings without loading your knees much.
- Lie on your back on a mat with your knees bent and feet flat on the floor, hip-width apart.
- Rest your arms by your sides and gently brace your stomach.
- Press through your heels and squeeze your glutes to lift your hips until your shoulders, hips and knees form a straight line.
- Pause for 1-2 seconds at the top, then lower slowly.
Form cues: don’t push your hips so high that your lower back arches. If you feel it mostly in your hamstrings, move your feet a little closer to your hips. For more floor-based glute moves, see our bodyweight glute workout for beginners at home.
Easier: lift your hips only a few inches. If getting down to the floor is difficult, skip this move and do an extra set of standing hip extensions. Harder: hold the top for 3-5 seconds, or march slowly, lifting one foot at a time while your hips stay up.
Sample Weekly Plan
Aim for 2-3 lower body sessions a week with at least one rest or easy day between them. Walking on the other days helps you work toward the 150-minute aerobic target:
- Monday: Lower body workout, 1-2 sets of each move
- Tuesday: Easy walk, 15-30 minutes
- Wednesday: Lower body workout, full sets
- Thursday: Walk, plus gentle stretching
- Friday: Lower body workout, full sets
- Saturday: Longer walk, or our low-impact fat burning workout at home with no jumping
- Sunday: Rest
How to progress: when every set feels controlled and the last couple of reps are no longer challenging, change one thing at a time. Add 2 reps, add a set, slow down the lowering part of each rep, use less support from the chair, or try the harder option for one exercise.
Common Mistakes to Avoid
- Doing too much in the first week. Starting with 1 set and building up makes it more likely you’ll stick with it and less likely you’ll be very sore.
- Leaning heavily on the chair. Use it for balance, not to hold your body weight. Lighter hands mean your legs do more of the work.
- Rushing the reps. Slow, controlled reps work your muscles better than fast, swinging ones.
- Arching the lower back. In hip extensions and bridges, stop the movement before your back starts to arch.
- Holding your breath. Breathe out as you stand up or lift, and breathe in as you lower.
Safety Tips
- Check with your doctor first if you haven’t exercised in a while, or if you have a heart condition, high blood pressure, diabetes, osteoporosis, a joint replacement, balance problems, a history of falls, or a recent injury or surgery.
- Work around sore joints. Use the easier options, shorten the range of motion, or skip any move that causes pain. Our article on home remedies for knee pain covers general knee-friendly habits.
- Stop if something feels wrong. Sharp or worsening pain, dizziness, chest discomfort or unusual shortness of breath are signs to stop and get medical advice.
FAQ
Is this workout only for seniors?
No. It’s designed for beginners over 50, including people who are fairly active but have never done strength training. The chair simply makes the moves steadier, and you can use less support as you get stronger.
How often should I do this lower body workout?
Two to three times a week on non-consecutive days is a good start. That fits the common guideline of muscle-strengthening activity on at least 2 days a week and leaves time to recover between sessions.
Can I do this workout if I have bad knees?
Many people with sensitive knees can do it with changes. Raise the chair seat for sit-to-stands, keep split squats very shallow, and avoid any move that causes pain. If you have a diagnosed knee condition, ask your doctor or a physical therapist which moves suit you.
Do I need weights?
Not to start. Your body weight provides enough challenge for most beginners. Later you can add a resistance band for side leg raises, or hold a light dumbbell or filled water bottle during sit-to-stands.
How long until it gets easier?
It varies from person to person and depends on your starting point, how often you train, how you progress, sleep and other habits. Many people notice the reps feeling smoother before they notice other changes.
Disclaimer: This article is for general information only and is not medical advice or a substitute for advice, diagnosis, or treatment from a qualified doctor. Please talk to a healthcare professional before starting a new exercise program, especially if you have a health condition, and read our full disclaimer.
Disclaimer: This article is for general information only and is not a substitute for advice, diagnosis or treatment from a qualified doctor. Please talk to a healthcare professional before changing your diet, exercise or medicines, especially if you are pregnant, breastfeeding or have a health condition, and read our full disclaimer.