

Quick answer: A mini band leg workout for beginners can train your glutes, thighs and hips at home with just one small loop band and a little floor space. This plan uses 6 moves: banded squat, squat side step, standing kickback, banded glute bridge, side-lying leg raise and standing hip abduction. Do 2-3 sets of each with slow, controlled reps, rest 30-60 seconds between sets, and repeat the workout 2-3 times a week on non-consecutive days.
You can hold a chair for balance on any standing move. Below: picking a band, where to place it, the plan, form cues, easier and harder options, a sample week, mistakes and FAQs.
Why Use a Mini Band for Leg Workouts at Home?
A mini band (also called a loop band or booty band) is a short loop of elastic worn around your thighs or ankles. It’s cheap, light and fits in a drawer.
The band adds resistance sideways, so side steps and hip abductions make the muscles on the outside of your hips push against it, while squats and bridges still work your quads, hamstrings and glutes. Because the band gets tighter as it stretches, you can adjust most moves just by changing your stance or range of motion.
There’s no jumping, so it suits apartments and early mornings. If you’d rather start with no equipment at all, try our bodyweight glute workout for beginners at home for a week or two, then add the band.
The CDC’s adult activity guidelines recommend muscle-strengthening activities on 2 or more days a week that work all major muscle groups, including the legs and hips, alongside at least 150 minutes of moderate aerobic activity. This routine covers your lower body; train your upper body and core on other days.
What You’ll Need
- One mini loop band. Light or medium resistance is a good place to start.
- A mat or carpet for the glute bridge and side-lying leg raise.
- A sturdy chair or wall for balance during kickbacks and hip abductions.
- Shoes or bare feet on a non-slip floor, not socks.
- About 20-25 minutes, including a 5-minute warm-up.
How to Choose Your Band Strength
Band colors vary by brand, so don’t rely on color alone. A practical test: you should be able to finish every rep with good form while feeling like you could do only 2-3 more. If your knees cave in or you can’t keep tension on the band, it’s too strong.
Where Should the Band Go?
Placement changes how hard each move feels. Above the knees is the easiest and most comfortable spot for beginners, and it’s where the band goes for most of this plan. Around the ankles makes side steps and leg lifts harder, because the band is farther from your hips. Avoid putting the band directly on your kneecaps.
Mini Band Leg Workout for Beginners: The 6-Move Plan
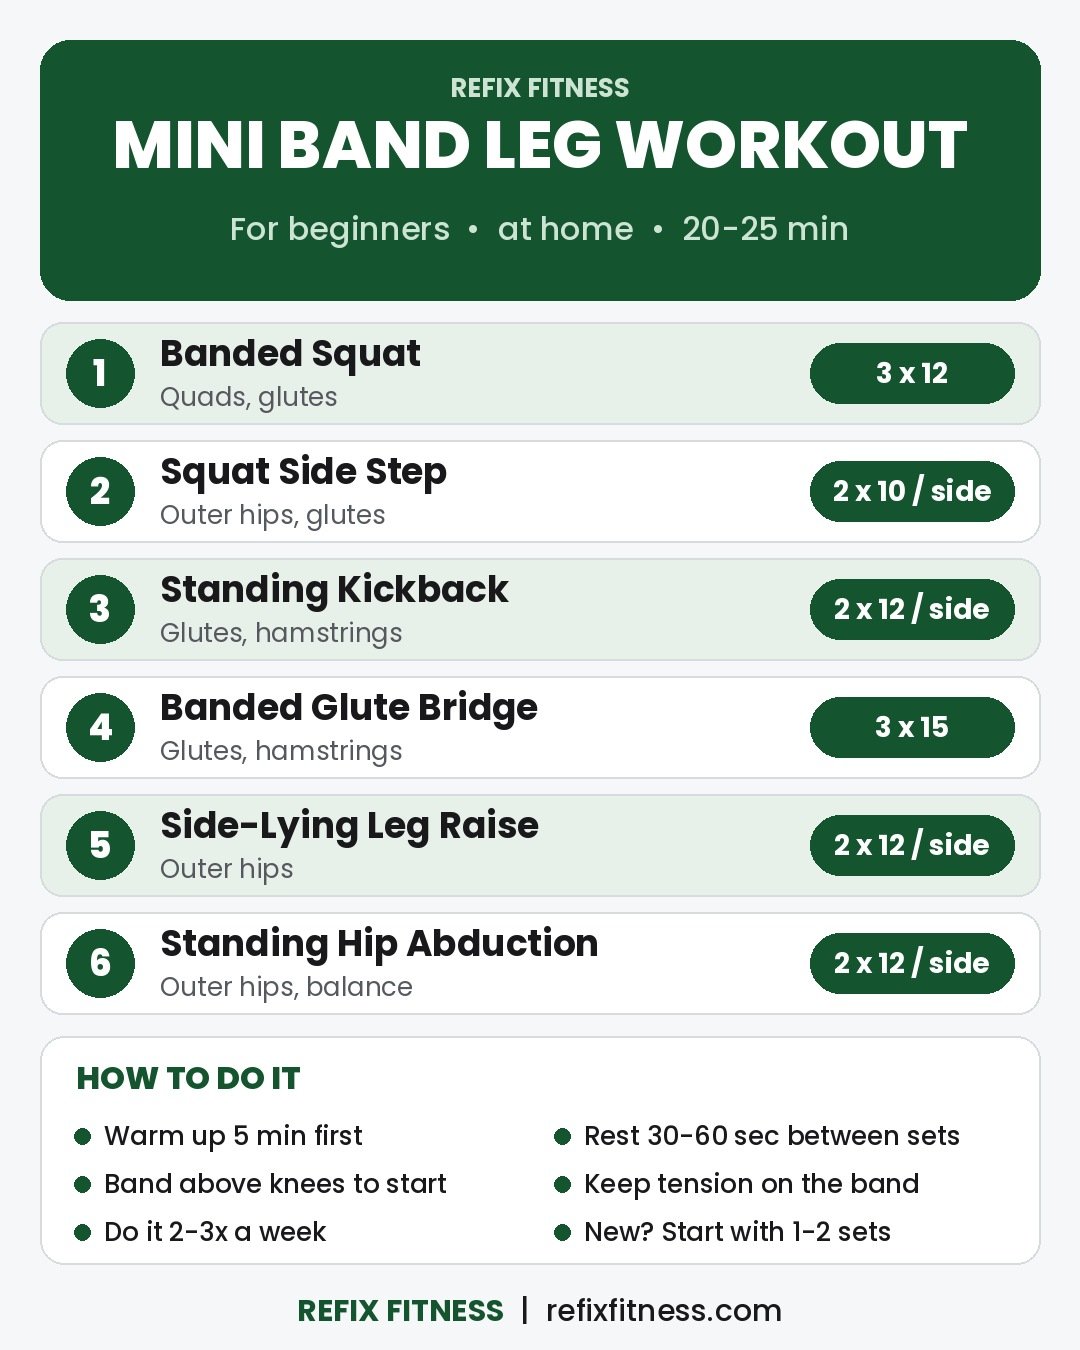
Warm up for about 5 minutes without the band: march in place, then do 10 squats, 10 glute bridges and 10 side steps each way. Do the moves in order, finishing all sets of one move before the next. Rest 30-60 seconds between sets. In your first week or two, 1-2 sets of each move is plenty.
| # | Exercise | Sets x Reps | Main Focus |
|---|---|---|---|
| 1 | Banded Squat | 3 x 12 | Quads, glutes |
| 2 | Squat Side Step | 2 x 10 steps per side | Outer hips, glutes |
| 3 | Standing Kickback | 2 x 12 per side | Glutes, hamstrings |
| 4 | Banded Glute Bridge | 3 x 15 | Glutes, hamstrings |
| 5 | Side-Lying Leg Raise | 2 x 12 per side | Outer hips |
| 6 | Standing Hip Abduction | 2 x 12 per side | Outer hips, balance |
1. Banded Squat
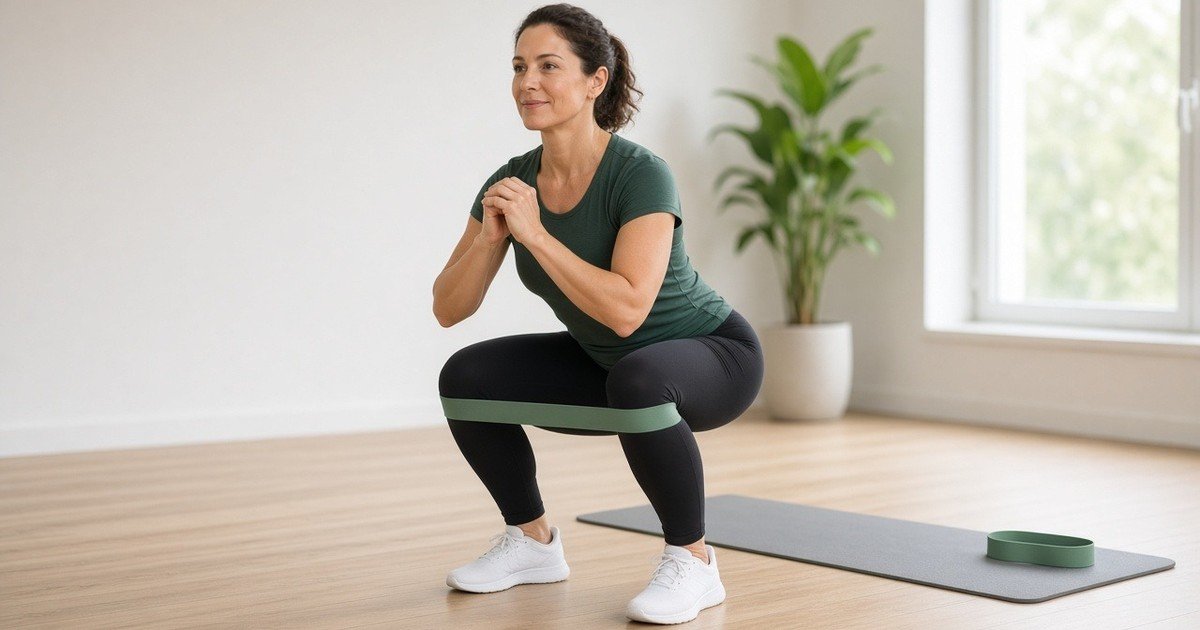
A regular squat with one extra job: press gently out against the band so your knees don’t drift inward.
- Place the band just above your knees. Stand with your feet about hip- to shoulder-width apart, toes turned out slightly, so there’s light tension on the band.
- Brace your stomach gently, then sit your hips back and down as if lowering to a chair.
- Lower as far as you can with your heels flat and chest up, pressing your knees out against the band.
- Push through your whole foot to stand, squeezing your glutes at the top.
Form cues: knees track in line with your toes and the band never goes slack.
Easier: squat to a chair, or hold a chair for balance. Harder: take 3 seconds to lower, or pause for 2 seconds at the bottom.
2. Squat Side Step
Also called a lateral band walk, this is the classic mini band move for the outer hips.
- Keep the band above your knees. Bend your knees and hinge slightly into a quarter squat, feet hip-width apart.
- Step your right foot out to the side, wide enough to stretch the band.
- Bring your left foot in partway, keeping tension on the band so your feet never touch.
- Take 10 steps right, then 10 steps back left. That’s one set.
Form cues: stay low and level, toes pointing forward, and don’t let your trailing knee collapse inward.
Easier: stand taller and take smaller steps. Harder: move the band to your ankles or sink a little lower into the squat.
3. Standing Kickback
Works your glutes and hamstrings while your standing leg works on balance.
- Place the band around your ankles. Stand tall and hold the back of a chair or a wall with both hands.
- Shift your weight onto your left leg with a soft bend in that knee.
- Keeping your right leg straight, press it back and slightly up against the band, squeezing your glute.
- Pause for a second, lower with control, and finish all reps before switching sides.
Form cues: move from your hip, not your lower back. Keep your pelvis facing forward; a small kick done well beats a big one.
Easier: do it with no band, or move the band above your knees. Harder: add a 2-second hold at the top of each rep.
4. Banded Glute Bridge
A beginner-friendly glute move; the band adds work for the sides of your hips.
- Place the band just above your knees. Lie on your back with your knees bent, feet flat and hip-width apart, arms by your sides.
- Press your knees gently out against the band.
- Push through your heels to lift your hips until your body forms a straight line from shoulders to knees.
- Squeeze your glutes for a second at the top, then lower slowly.
Form cues: lift with your glutes, not by arching your lower back. Keep your knees in line with your feet throughout.
Easier: do it without the band, or lift only partway. Harder: at the top, open your knees out against the band and back in for 3 small pulses before lowering, or hold the top for 3 seconds.
5. Side-Lying Leg Raise
A floor move that targets the outer hips without putting weight on your knees.
- Place the band just above your knees (easier) or around your ankles (harder). Lie on your left side with your legs straight and stacked, head resting on your arm.
- Bend your bottom knee slightly for stability if you need to.
- Keeping your top leg straight and your toes pointing forward, lift it against the band to about hip height or a little higher.
- Lower slowly and finish all reps before rolling to the other side.
Form cues: don’t roll your hips backward. Imagine your heel leading the lift, not your toes.
Easier: bend both knees and do a clamshell instead. Harder: move the band to your ankles and pause at the top.
6. Standing Hip Abduction
The standing version of the side leg raise, plus one-leg balance practice.
- Place the band around your ankles and hold the back of a sturdy chair with one or both hands.
- Stand tall with your weight on your left leg and a soft bend in that knee.
- Lift your right leg out to the side against the band, keeping your toes pointing forward.
- Lower with control and finish all reps before switching sides.
Form cues: keep your body upright and avoid leaning away from the moving leg. A small lift is fine.
Easier: move the band above your knees. Harder: hold the chair with just your fingertips, or pause for 2 seconds at the top.
Sample Weekly Plan
Do the workout 2-3 times a week with at least one day off between sessions. Here’s one simple way to set up your week:
| Day | What to Do |
|---|---|
| Monday | Mini band leg workout |
| Tuesday | Brisk walk, 20-30 minutes |
| Wednesday | Upper body or core workout |
| Thursday | Mini band leg workout |
| Friday | Brisk walk or easy bike ride |
| Saturday | Optional third leg session, or gentle stretching |
| Sunday | Rest |
How to Progress Over the Weeks
Change one thing at a time. For the first 1-2 weeks, do 1-2 sets per move with the band above your knees, then build up to 3 sets. After that, try slower reps and pauses, move the band to your ankles, or switch to the next band level. The NHS guide to strength exercises gives similar advice: build up slowly and increase repetitions gradually over time.
When you’re ready for more load, our dumbbell lower body workout at home with no bench is a natural next step.
Common Mistakes to Avoid
- Letting the band go slack. In side steps and squats, keep light tension the whole time.
- Knees caving in. If the band pulls your knees inward, use a lighter band and focus on pressing out.
- Arching your lower back. In kickbacks and bridges, move from your hips with your ribs down.
- Swinging the leg. Momentum takes the work away from your muscles. Lift and lower slowly.
- Placing the band on your kneecaps. Keep it just above or below the knee joint.
- Holding your breath. Breathe out as you push or lift, and breathe in as you return.
Safety Tips
- Check with your doctor first if you haven’t exercised in a while, are pregnant or recently gave birth, or have a heart condition, high blood pressure, or a back, hip, knee or ankle problem.
- Inspect your band. Replace it if you see nicks or tears, and skip latex bands if you have a latex allergy.
- Use support. Hold a chair or wall for any standing move where you feel unsteady.
- Stop if something feels wrong. Sharp pain in your knee, hip or lower back, dizziness or chest discomfort are signs to stop, and get medical advice if they don’t settle.
If balance or floor work is a concern, a chair-supported plan like our lower body workout for beginners over 50 at home may be a better starting point.
FAQ
Are mini bands good for beginners?
Yes. Mini bands are light, low impact and easy to adjust. Start with a light band above your knees and 1-2 sets per move.
Should the band go above the knees or around the ankles?
Above the knees is easier and more comfortable, so it’s the best place to start. Moving the band to your ankles makes side steps and leg lifts harder. Avoid putting it directly on your kneecaps.
How often should I do a mini band leg workout?
Two to three times a week on non-consecutive days is a good starting point. That fits the common guideline of muscle-strengthening activity on at least 2 days a week and gives your muscles time to recover.
Can a mini band workout replace weights?
For beginners, a band is a good way to build strength and learn the movements. As it gets easier, adding dumbbells or harder variations keeps the work challenging, and bands and weights also work well together.
Disclaimer: This article is for general information only and is not medical advice or a substitute for advice, diagnosis, or treatment from a qualified doctor. Please talk to a healthcare professional before starting a new exercise program, especially if you have a health condition, and read our full disclaimer.
Disclaimer: This article is for general information only and is not a substitute for advice, diagnosis or treatment from a qualified doctor. Please talk to a healthcare professional before changing your diet, exercise or medicines, especially if you are pregnant, breastfeeding or have a health condition, and read our full disclaimer.